User & Account Settings
The User & Account Settings section allows you to manage your personal profile, security preferences, display settings, and language options within CONNECTPlayer CMS.
It also provides tools for managing groups and user permissions, allowing organizations to securely control access to devices, content, and other system resources.
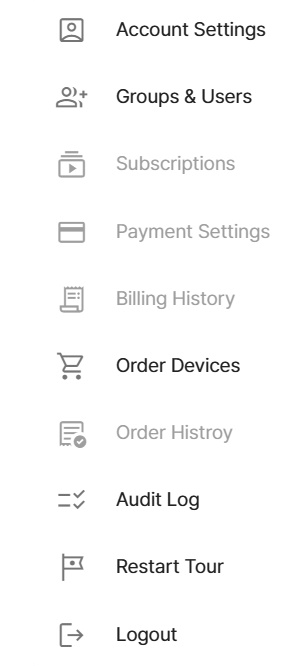
Click ➊ Your Username in the upper-right corner of the screen to open the drop-down menu.
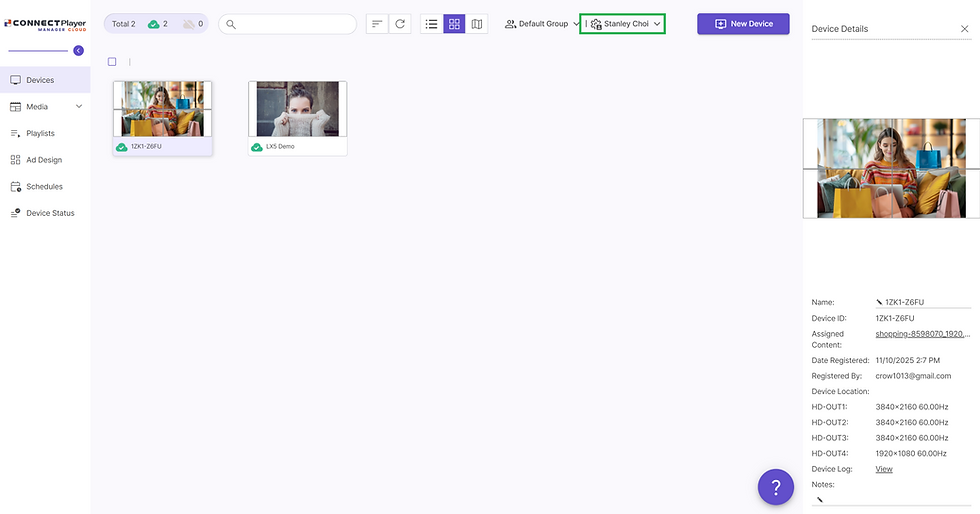
➊
Account Settings
Select Account Settings to open Account Settings.

Profile: Manages your personal account information and security settings:
-
E-mail:
-
Displays the email address associated with your account.
-
This email address is used for sign-in and account-related notifications.
-
-
Name: Displays or updates the name associated with your account.
-
Mobile Phone Number:
-
Add or update your mobile phone number.
-
This number can be used for SMS verification and password recovery.
-
-
Password / Confirm Password:
-
Create or update your account password.
-
To help prevent errors, you must enter the same password in both fields.
-
-
Two-Factor Authentication: Enable or disable two-factor authentication to enhance account security.
-
Language: Select your preferred interface language.
-
English
-
Korean
-
Japanese
-
Display Format:
-
Date Format: Select Celsius or Fahrenheit. (e.g., MM/dd/yyyy: 11/09/2025)
-
Time Format: Choose your preferred time display format. (e.g., 12-hour: 8:21 PM or 24-hour: 20:21)
-
Temperature: Selects between Celsius or Fahrenheit.
Group and User Management
A Group is an independent workspace that contains its own devices, content, and users.
Groups allow organizations to separate resources by department, location, customer, or business unit while maintaining centralized administration and access control. Role-based permissions help ensure secure and organized management across the system. Please refer to Group and Permission Structure diagram below.

-
Click Groups and Users to open the ➊ Group List window. Follow these steps to create or manage a group:
-
Click ➋ New Group in the upper-right corner, then enter the Group Name and Description.
-
Click Save.
-
The newly created group will be displayed in the ➌ Group List.
-
-
To rename a group, click the ➍ Edit icon next to the group name.
.png)
➊
➋
➌
➍
➎


-
To add a user, click ➎ New User in the upper-right corner of the Group List window.
-
Enter the following information:
-
Email Address
-
Name
-
Permission Level:
-
User: Can manage assigned devices and content within their designated group.
-
Administrator: Includes all User permissions and can manage other users within the same group.
-
Super Administrator: Has full system-wide administrative privileges, including the ability to:
-
Create and delete groups
-
Manage users across all groups
-
Access all devices and content
-
Configure system-wide settings
-
-
-
-
After you click Save, an invitation email is sent to the specified user.


Products
Use Cases