Layout Overview
Layouts allow you to create and manage digital signage content by arranging Assets and Widgets on a canvas.
You can quickly get started with pre-built templates or design freely from a blank canvas, and enhance your content with widgets that provide real-time information such as weather, news, and calendars. With drag-and-drop editing, layer management, and real-time data integration, anyone can easily create high-quality content.
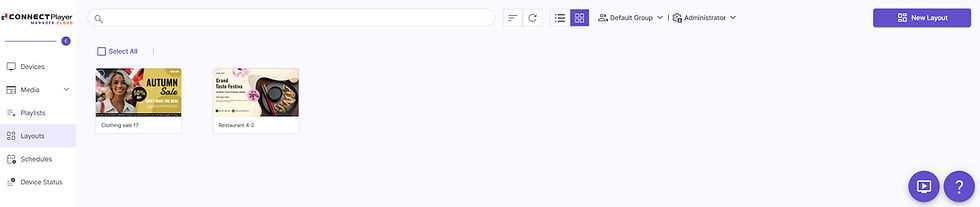
Go to the Layout page and click ➊ New Layout to open the Template Library.
➊
Browse Templates in the Template Library
Templates help you create content quickly while maintaining brand consistency. Easily customize designs to suit various situations.
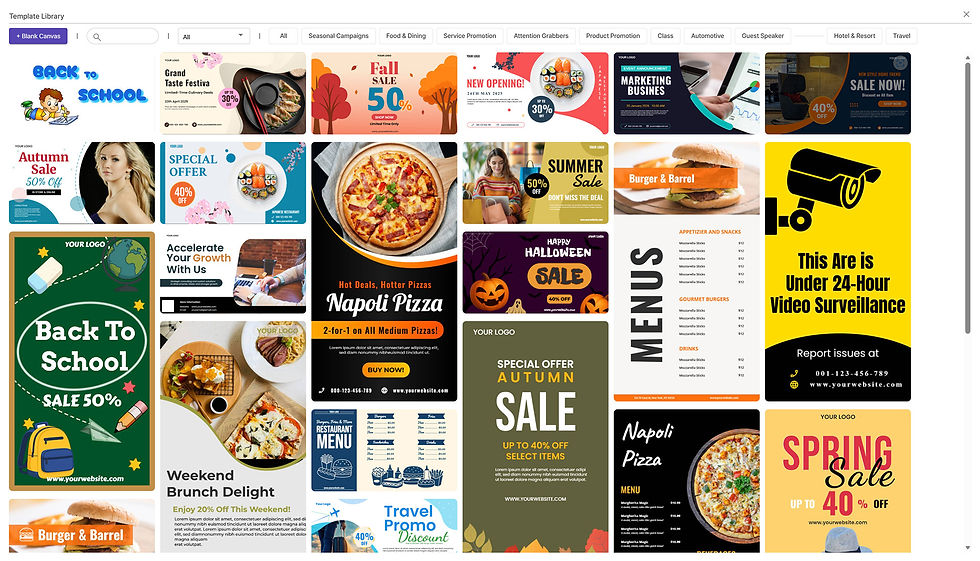
➋ +Blank Canvas: Start designing from scratch on a blank canvas without using a template.
➌ Category: Templates are categorized by purpose and theme. Use keyword search or browse categories to find the perfect template.
-
Categories: Seasonal Campaigns, Food & Dining, Service Promotions, Attention Grabbers, Product Promotions, Classes, Automotive, Guest Speakers, Hotels & Resorts, Travel.
Click a template to open Layout Editor. You can freely utilize various Assets such as images, videos, and text, as well as Widgets to complete your Layout.
➌
➋
Layout Editor Overview
The Layout Editor is where you create and manage content for your displays. You can combine images, videos, text, playlists, and widgets into a single layout, which is easy to use even without prior design experience.
➊ Canvas Settings: Click the icon to open the Canvas Settings panel, where you can configure the screen orientation, video wall layout, and background color or audio.
➋ Assets Panel: Assets are basic content objects used to build a layout, such as images, videos, text, web pages, and shapes.
➌ Widgets Panel: Widgets are dynamic content objects that automatically display and update information based on external data sources, such as weather, clocks, and RSS feeds.
➍ Top Toolbar: This area contains tools for manipulating Assets and Widgets on the canvas, such as deleting assets and widgets, alignment, zoom control, and previewing.
➎ Canvas: A workspace where you place selected assets and widgets and perform actual design work.
➏ Layers Panel: This is a dedicated space for managing and selecting the order of assets and widgets placed on the screen.

➊
➋
➍
➎
➌
➏
Canvas Settings
Canvas settings provide a work environment that matches the physical configuration of your display, allowing you to design layouts in a state identical to the final output.
-
Screen Orientation: Set the screen to Landscape or Portrait mode.
-
Landscape
-
Portrait
-
-
Video Wall Layout: Provides the following layout options for multi-monitor installations:
-
1×1, 1×2, 1×3, 1×4, 2×1, 3×1, 4×1, 2×2
-
-
Background Color: Select the canvas background color.
-
Background Audio: Add background music to play along with the layout.

Layers Panel
Layers Panel shows all Assets and Widgets on the canvas, allowing you to manage their order, visibility, and properties.
Layer List :
-
Shows all assets and widgets in the design, such as text, shapes, icons, images, and videos.
-
Each layer is labeled by type or file name for easy identification.
-
Reorder Layers: Drag and drop layers to change their stacking order on the canvas.
-
⓫ Lock/Unlock (Lock Icon): Lock a layer to prevent accidental changes; unlock it when editing is required.
-
⓬ Visibility Toggle (Eye Icon): Toggle visibility of individual layers without deleting them.
-
⓭ Delete (Trash Icon): Remove the selected layer from the canvas.

⓫
⓬
⓭
Top Toolbar

➊
➋
➌
The top toolbar provides quick access to essential editing functions on the canvas. It allows you to intuitively control elements positioning, layers, and data synchronization during design work.
-
➊ Delete icon: Removes the selected Assets and Widget from the canvas.
-
Duplicate icon: Create an exact copy of the selected assets and widget and add it to the canvas.
-
Undo(Ctrl+Z) / Redo(Ctrl+Y) icon: Cancel the most recent action performed / Restore the action that was undone using Undo.
-
Bring Forward / Send Backward icon: Moves the selected assets and widget one layer forward or backward.
-
➋ Toggle Layer Visibility icon: Shows or hides the Layer Panel on the right.
-
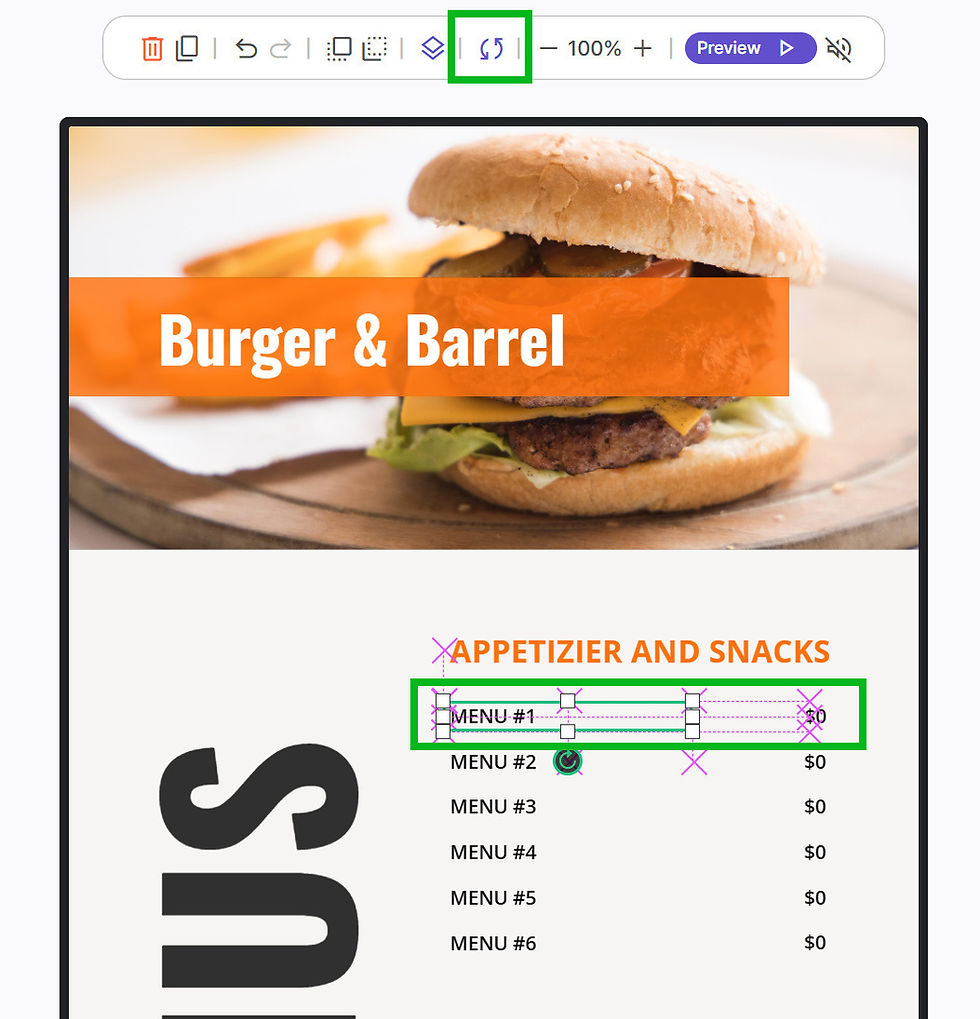
➌ Google Sheets Integration icon: Click to open Google Sheets Integration Settings.
Using the Google Sheets Integration feature in CONNECTPlayer CMS, you can link data stored in Google Sheets with assets in the layout canvas in real time. By connecting specific cells in a Google Sheet to template assets, the content on the canvas is automatically updated whenever the sheet data changes.
-
Zoom Controls: Zoom in or out of the canvas view.
-
Preview: Displays a real-time preview of your design as it will appear on the screen.
-
Mute / Unmute: Toggles audio playback during preview mode.
-
Create and Share a Google Sheet
-
Create a Google Sheets document to be linked with your menu template.
-
Click ➍ Share button in the upper-right corner.
-
➎ Change General Access to Anyone with the link.
-
Set the permission to Viewer and click ➏ Done.
※ The sharing setting must be changed so that external systems can access the data.
-
➒ Additional Menu Integration: Using the same method, connect Google Sheets cells for MENU #2 through MENU #13.
-
➓ Image Integration: Enter the shared URL of an image stored in Google Drive into the sheet and link it to an image asset. You can then update the displayed image simply by changing the URL in the sheet.
Note: To use images stored in Google Drive, the file must be shared. Change the sharing setting to Anyone with the link.


➍
-
➐ Click the Google Sheets Integration icon on the top toolbar to open the ➑ Google Sheets Integration Settings window. Enter the following information and click the Save button.
-
Google Sheet URL: Copy and enter the URL of the Google Sheet you want to connect.
-
Sheet Name: Enter the name of the sheet tab located at the bottom of Google Sheets. (e.g., menu item)
-
Sheet Range: Enter the starting cell position from which data will be read. For example, if the first menu item starts at cell A2, enter A2.
-
Refresh Interval: Set how often (in minutes) changes made in Google Sheets are automatically synchronized.
➎
➏

➑
➓
➒
➐


Products
Use Cases